Tags in DCT

Overview

DCT powers data governance with tags. These key-value pairs can be used to associate any business-level data with any Delphix object, to drive greater intelligence in automation, administrative workflows, data access, and reporting. Advanced search for tags is available.

Tags are individual attributes on every object exposed in DCT; from VDBs, to compliance jobs, and even users. There are no limits on tag count per object and character limits are set for flexibility to enable robust grouping. 

Plan your tagging strategy

DCT tags serve as the Delphix-wide business metadata system. These Key:Value pairs can be applied to any object and used for search and filter in virtually every DCT workflow, from automation to administration, all the way to access control.

It is paramount to develop a tagging strategy prior to deployment in order to develop a scalable metadata solution.

Some examples of popular tagging strategies:

Theme Sub-topics Tag (Key:Value) example

Owner

Application, Business, Project, Team (scrum, QA,…)

(Owner: Finance App), (Owner: AppTeam Alpha), (Owner: John Doe), …

Application


(Application: Alpha)

Environment


(Environment: Non Production)

Location

Data Center, Region, Name, Cloud

(Geo: West Coast), (Data Center: Azure WC), …

In addition to designing which tags to implement, please consider who will have access to creating tags (i.e. developer vs admin-only, etc.), which will impact how teams are able to collaborate with one another.

Also, Delphix recommends that the DCT administrative team creates Delphix-wide documentation on these tagging standards to reduce the risk of deviation.

Administrative tagging

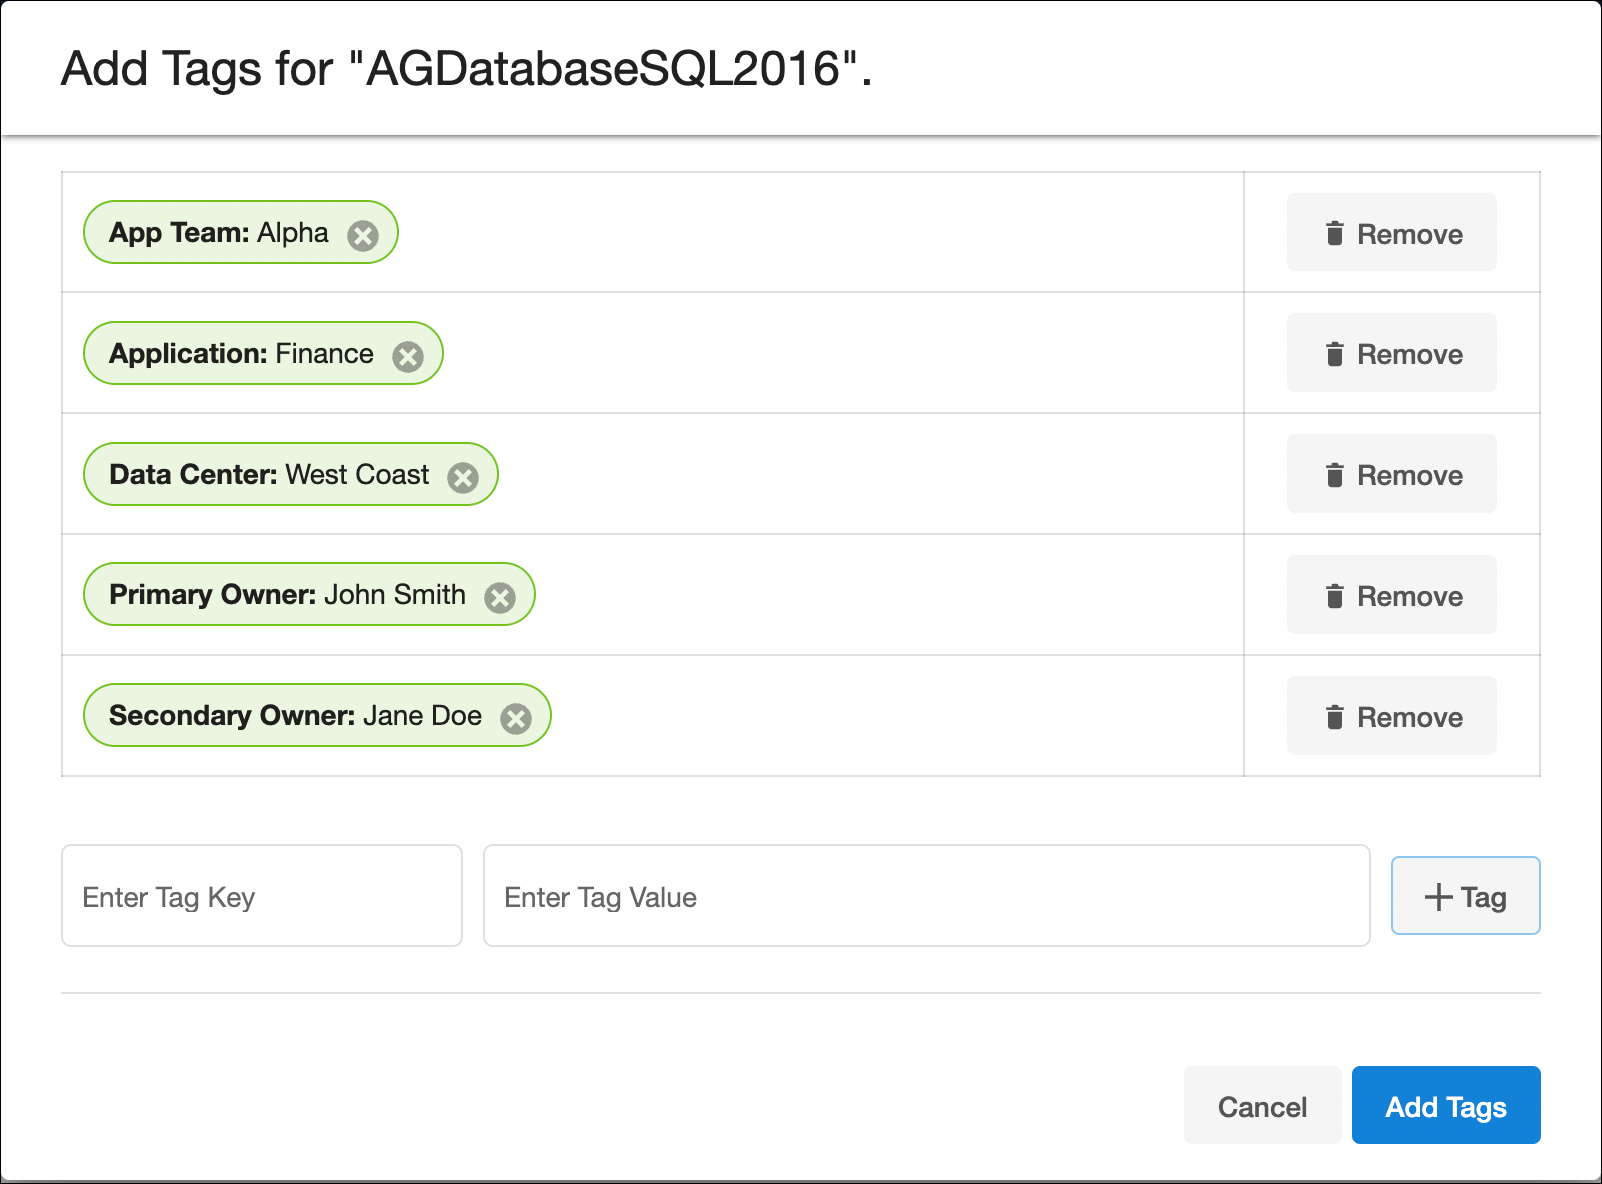
Tags can be managed from the UI by selecting “View Tags” for a particular object on its global list page. The below example shows the tag configuration screen for a dSource “AGDatabaseSQL2016” and multiple tags have been added to characterize that particular object: 

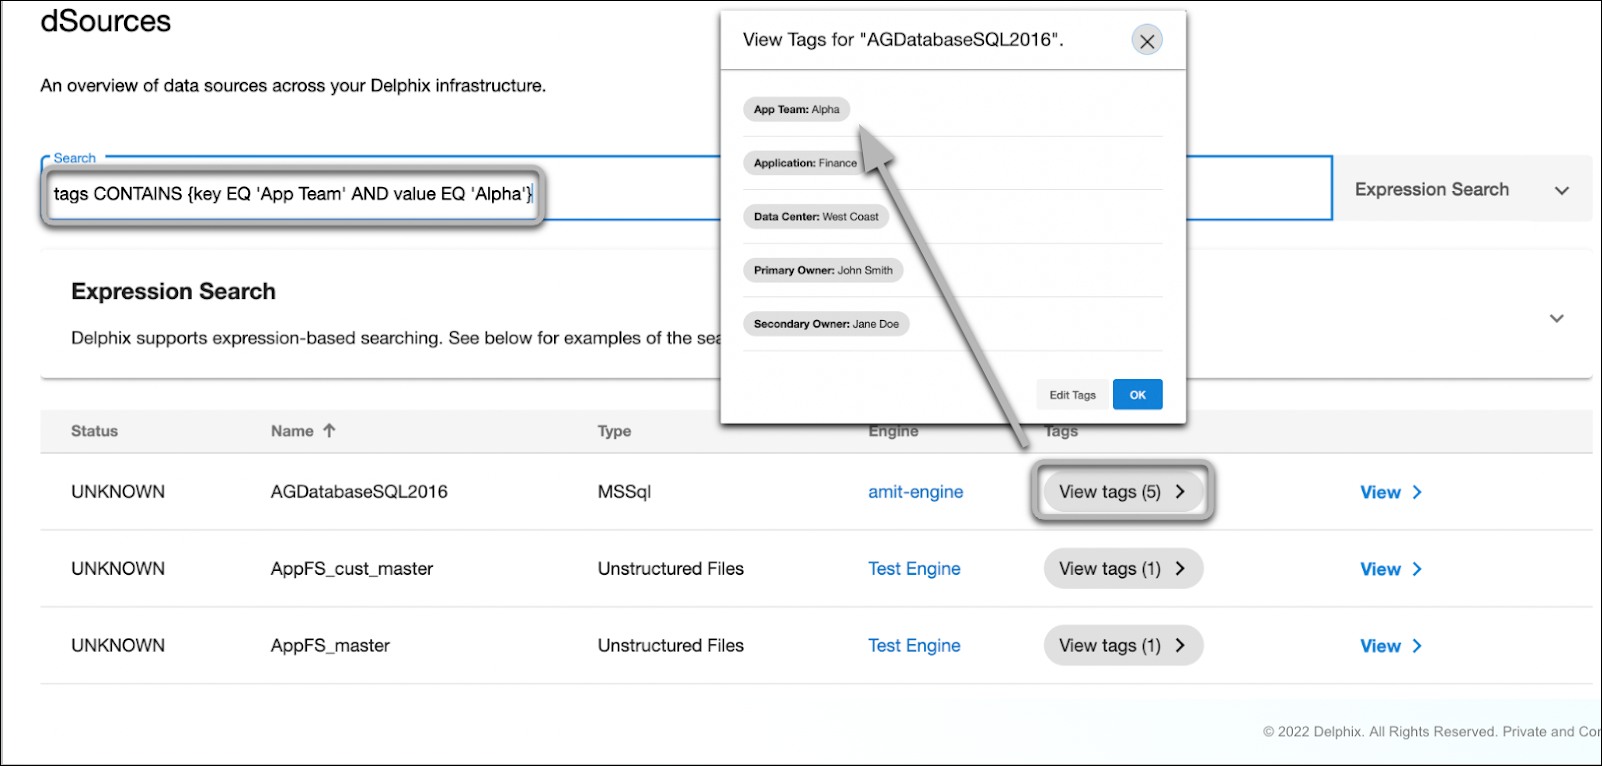
DCT tags enable complex searching to enable intelligent reports. A demonstration using the above example dSource and using expression-based search to filter dSources with the {App Team: Alpha} tag. 

Tags powering attribute-based Access Control

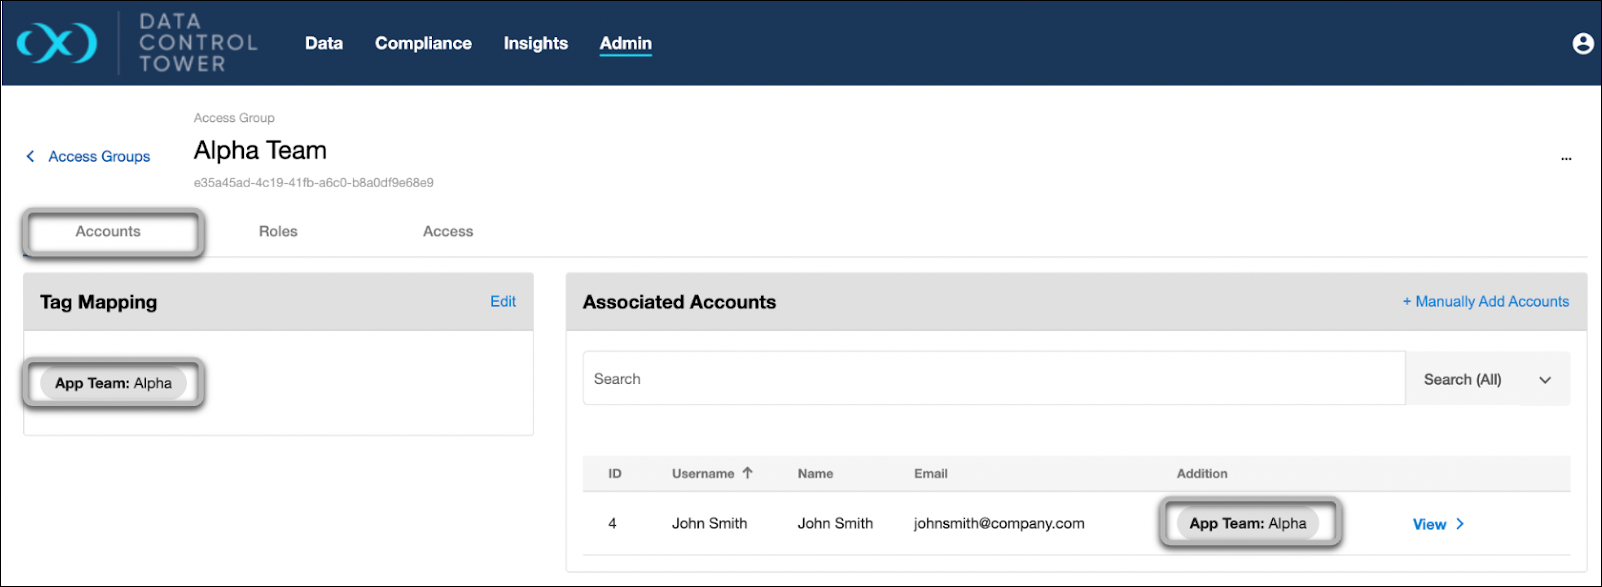
Tags also power the DCT permissions system for both Accounts (users) and Role Scopes (object entitlements). The below example shows an Access Group (Alpha Team) with the Accounts tab on display. Notice that the accounts tab has {App Team: Alpha} under “tag mapping”, which automatically attributes any users with the {App Team: Alpha} tag.

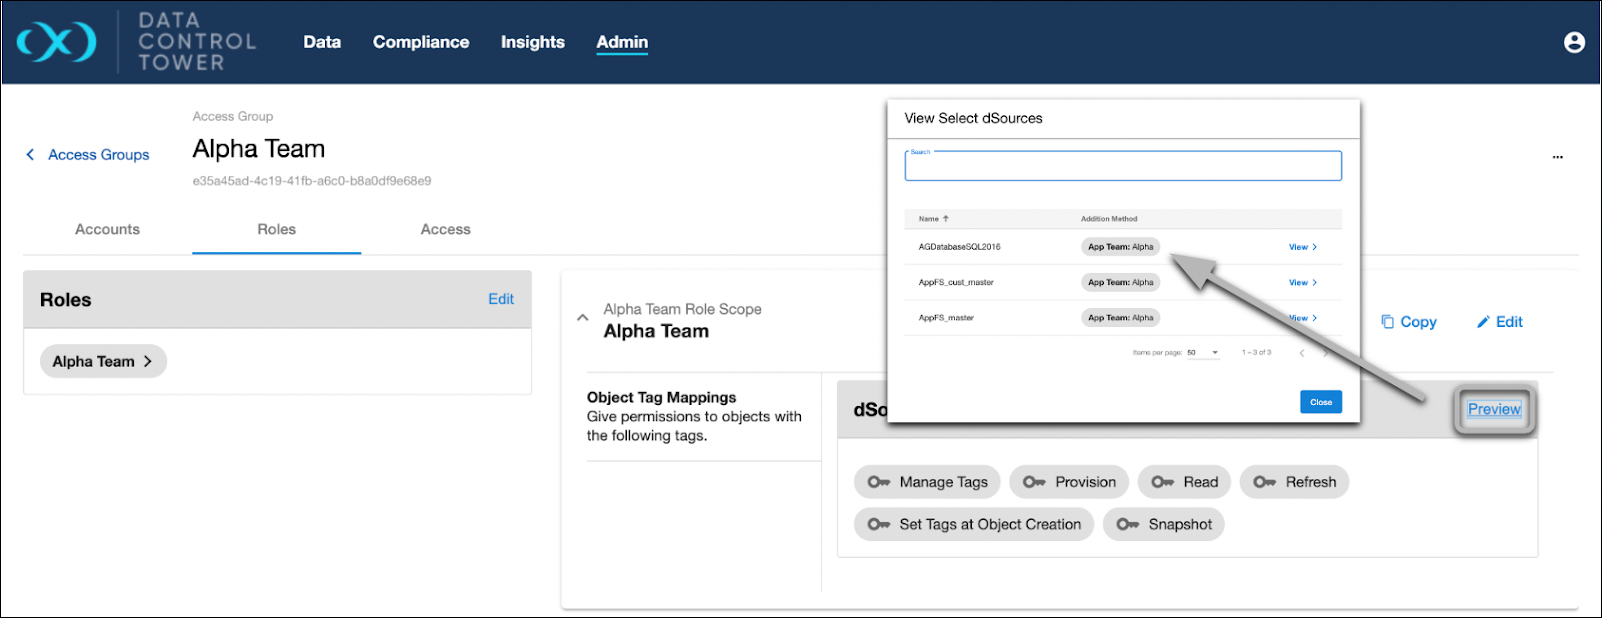
The same goes for Scoped Roles under the “Roles” tab. The Alpha Team role has been mapped to the {App Team: Alpha} tag and all dSources with that same tag are automatically attributed.

Tag Assignment

First, navigate to the Admin > Accounts tab and select an existing Account or feel free to create another one. Once selected, add a custom Tag such as "Team: Alpha”. If one already exists on the Account, such as login_groups, remember it. 

Next, navigate back to the Access Group, select the Tag Mapping’s Edit button, and specify that same Key: Value pair. It might look similar to the screenshot below.

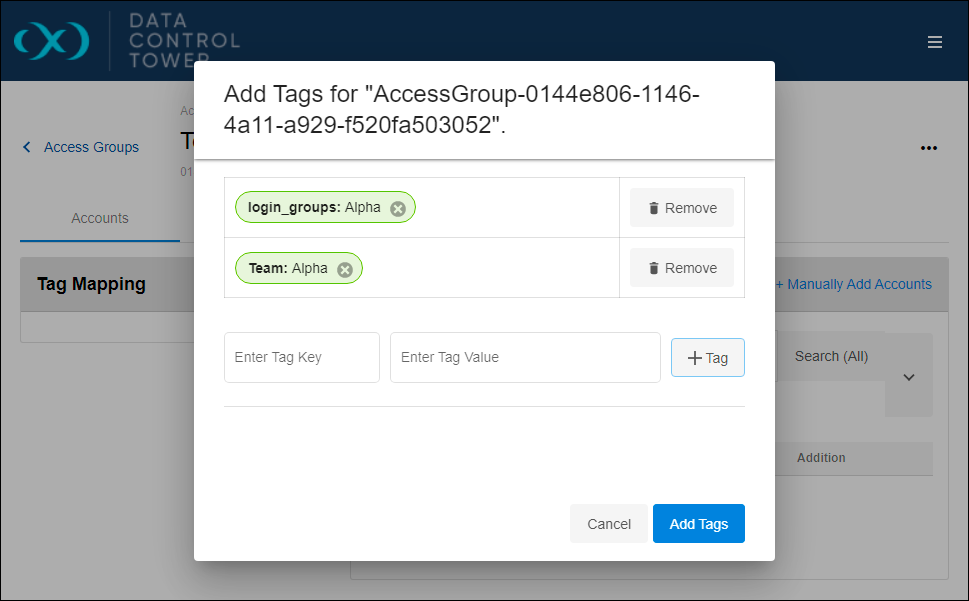
In this example, “Team: Alpha” and “login_groups: Alpha” were added through the Access Group’s Tag Mapping widget. If configured successfully, your Access Group might look similar to thescreenshot below. If you remove the Access Group or Account’s tag, you will see Account automatically removed from this listing.

The “login_groups” tag functions identically to a custom tag within the Access Group. Again, the only difference is that it's automatically assigned to the Account.

This section taught us how to organize Accounts into different groups. This allows us to keep permission sets separated. Feel free to experiment with new Access Groups, Tags, and Accounts.

Auto-tagging

Auto-tagging can modify object access. Review permissions carefully after auto-tagging objects.

All existing and new objects from then on will automatically get the configured tags, which are no different from ordinary tags that can be added to objects. The auto-tagging configuration can later be updated in the Data Engine Details page by going to the Action menu and selecting Auto-tagging Configuration. This will open up a window with a checkbox to enable or disable auto-tagging.

Disabling auto-tagging will not remove any of the tags that were previously added. Instead, new ingested objects will not have tags automatically applied. In order to delete these tags, this must first be disabled and the tags will need to be deleted manually on all affected objects.

Since auto-tagging can have an impact on access control, non-admins will require special permissions to configure auto-tagging.

  • To configure auto-tagging for pre-defined tags when registering an engine for the first time, the account must have a role with the Configure pre-defined auto-tagging at registration permission.

  • To update the auto-tagging configuration for pre-defined tags on a pre-registered engine, the account must have the Configure pre-defined auto-tagging on the ENGINE object they wish to update.

Configuring custom tags also requires another level of permissions.

  • To configure auto-tagging with custom tags when registering an engine for the first time, the account must have a role with the Configure custom auto-tagging at registration permission.

  • To update the auto-tagging configuration’s custom tags on a pre-registered engine, the account must have the Configure custom auto-tagging on the ENGINE object they wish to update.