Initial setup
Use this topic to complete the first-time setup of a Delphix Continuous Data Engine after you deploy the virtual appliance. The setup wizard runs the first time you connect to the appliance from a supported browser and walks you through required configuration tasks: administrators, time, network, storage, authentication, outbound connectivity, and registration.
Before you begin
-
Deploy the Delphix virtual appliance on your chosen platform (for example, VMware, cloud, or on-prem hypervisor).
-
Ensure the appliance is powered on and reachable from the machine where you will run your browser.
-
Confirm you have administrative credentials for any external services you will configure during setup (LDAP, IdP, NTP, object storage credentials, SMTP, proxy).
First login
-
Open a supported browser and navigate to your Delphix Engine URL.
-
Log in with the default credentials:
-
Username: sysadmin
-
Password: sysadmin
-
-
When prompted, change the default sysadmin password for security.
-
If you cannot log in, check that the Delphix Engine clock is in sync with your Identity Provider (IdP) clock. If they differ, configure an NTP server on the engine or set an SSO skew time in your IdP configuration. NTP is required for engines configured with Elastic Data storage.
If the same username exists in both the System Administrator domain (sysadmin) and the Engine Administrator domain (admin), SSH login becomes ambiguous. You must specify which account to authenticate against using a suffix:CopyUsing the wrong suffix will cause authentication failures, and repeated attempts may temporarily lock the user account. Always include the domain suffix to ensure login succeeds against the intended account.ssh username@DOMAIN@<engine-host>
ssh username@SYSTEM@<engine-host>
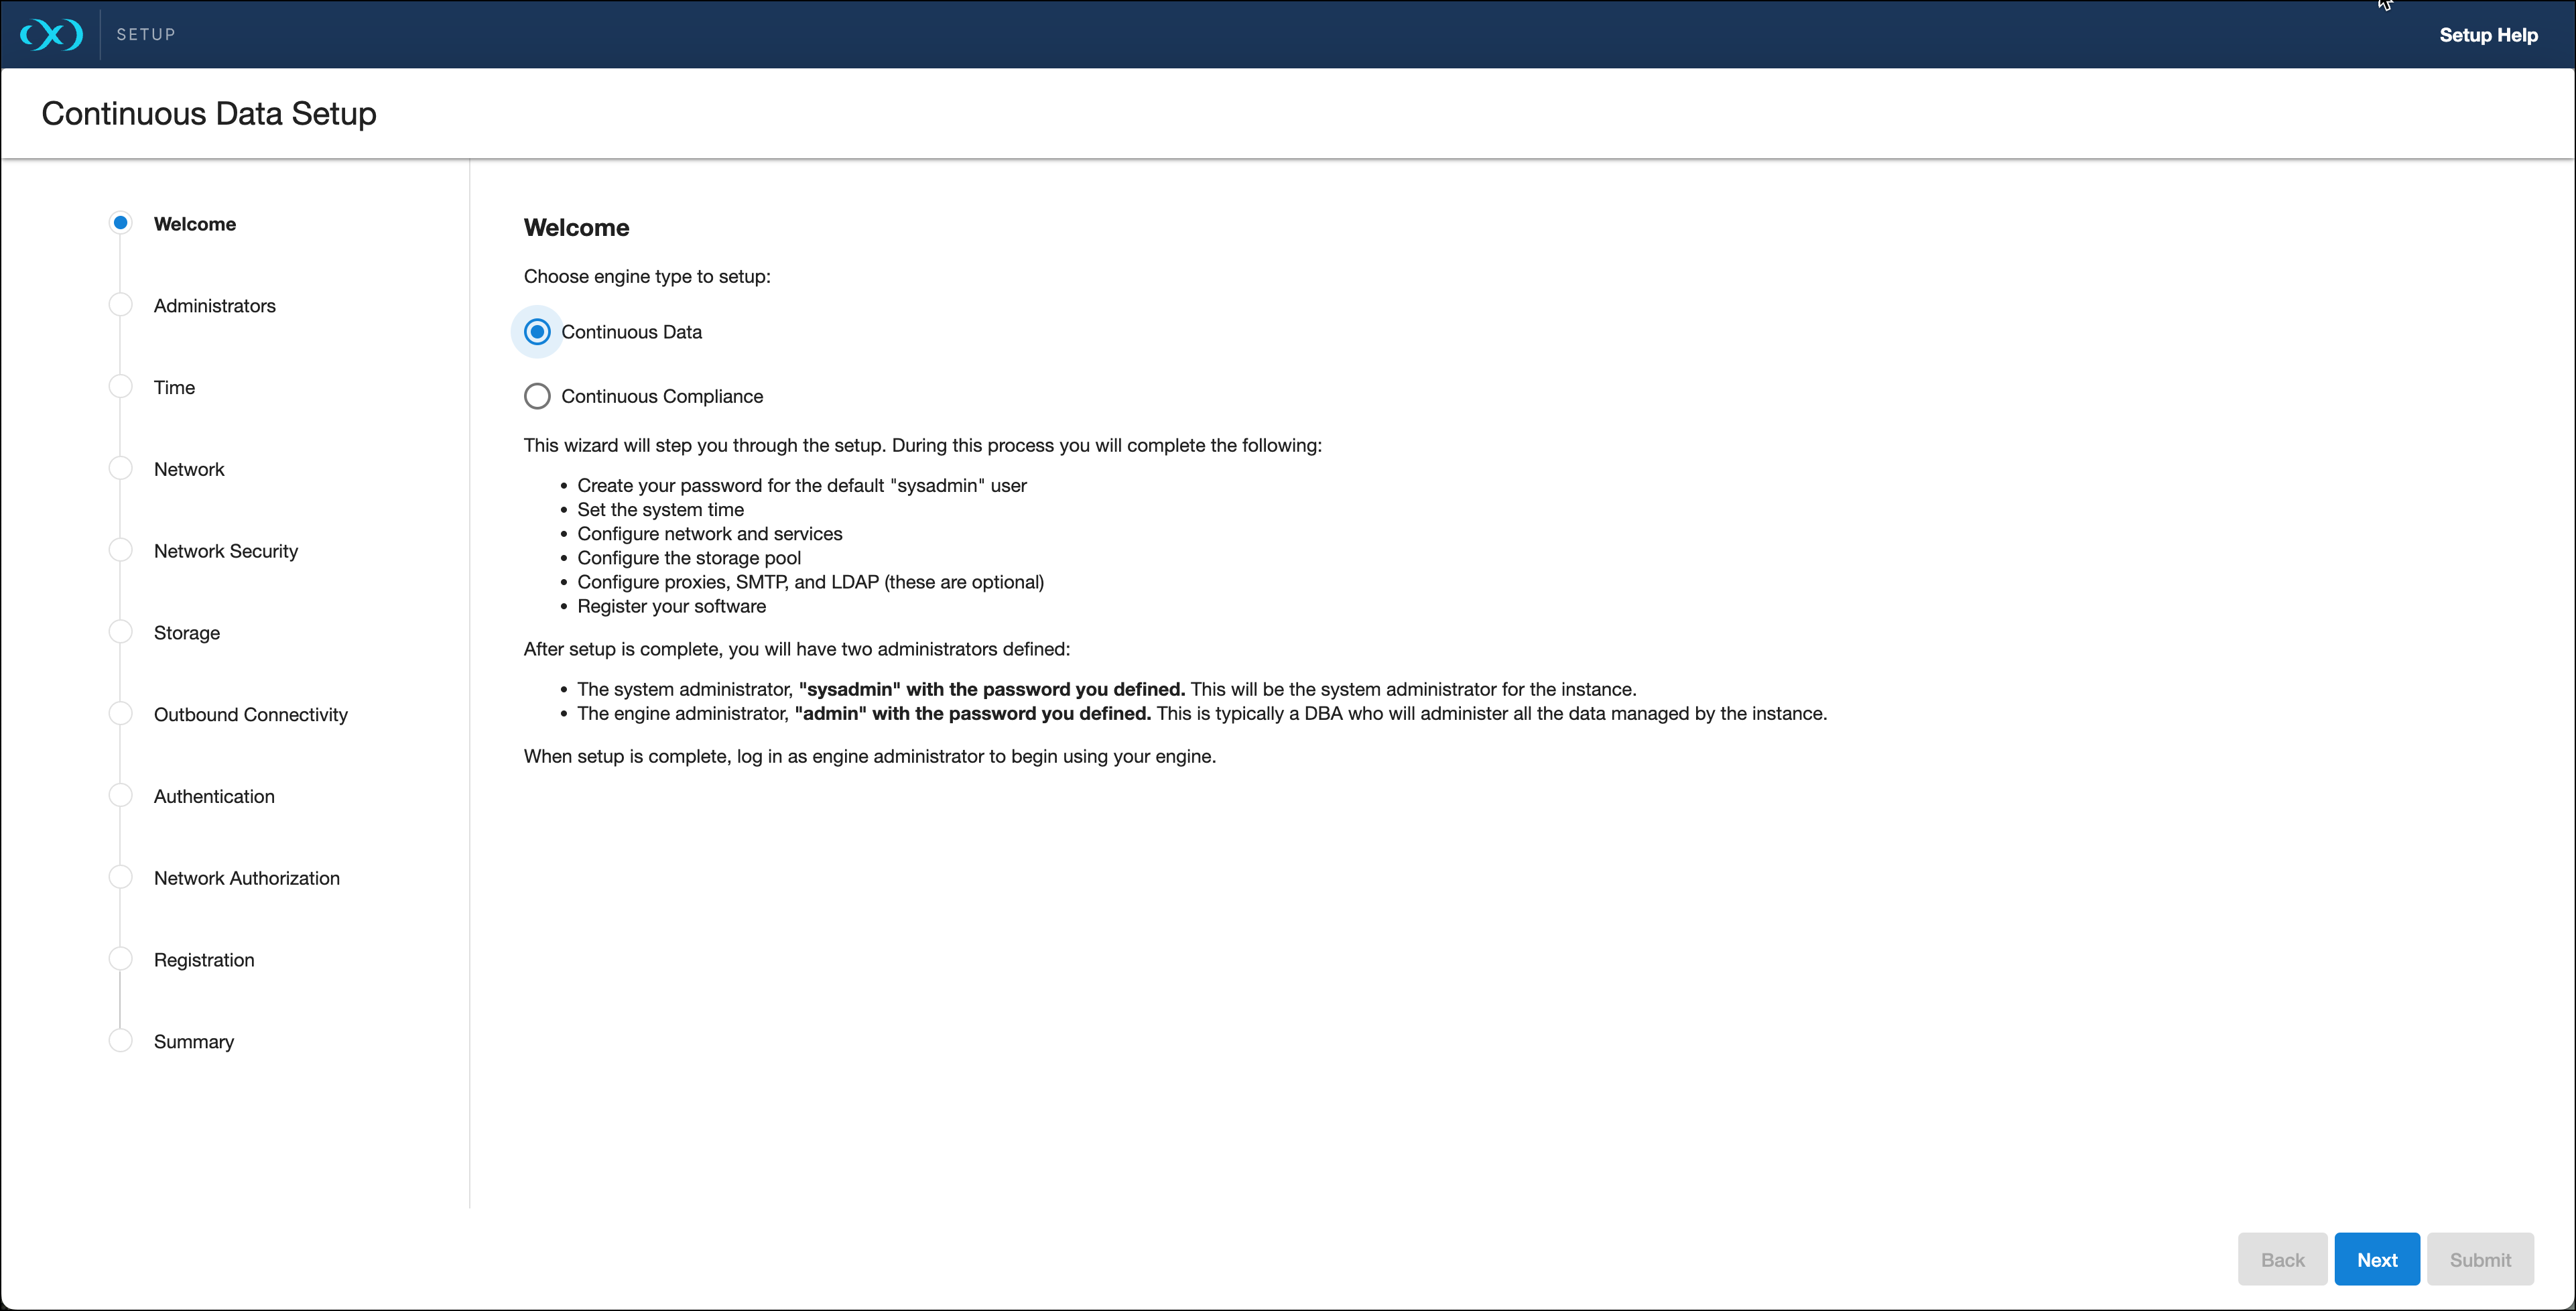
Welcome
On the Welcome page, select which engine you are setting up:
-
Continuous Data: proceed with the steps in this topic.
-
Continuous Compliance: read First time setup for Continuous Compliance.
Administrators
Provide an email address and passwords for the following default accounts under Administrator.
Continuous Data
-
System Administrator:
sysadmin, user-defined password. Manages system-wide configuration. -
Engine Administrator:
admin, user-defined password. Typically a DBA who manages data and environments.
Continuous Compliance
-
Administrator:
admin, user-defined password. Manages admin and user setup.
Time
The engine uses system time for policies and scheduled actions. Choose one:
-
Set NTP Server time (Recommended. NTP is required for engines configured with Elastic Data storage.)
-
Select a server from the list or add one or more NTP servers.
-
If you run the engine on VMware, configure the host NTP client to use the same servers.
-
-
Manually select time and date
-
Select Use browser time and date or pick a date/time with the calendar and clock controls.
-
If you set time manually, the date/time persists as local time even if time zones change.
-
Network
Your initial network configuration is pre-populated based on your deployment platform (VMXNET3 is used by default on VMware).
For each network interface, click Settings and configure:
-
DHCP or Static addressing: for static, enter an IP and subnet mask. Static IPs must be in CIDR format (for example 192.168.1.2/24).
-
Jumbo Frames: recommended when supported (VMXNET3 supports Ethernet jumbo frames to improve throughput and lower CPU usage).
-
Routing: specify a default gateway.
-
DNS Services: enter the DNS domain name and DNS server addresses.
Network security and certificates
The engine installs certificates signed by its Certificate Authority. You can manage HTTPS and DSP (Delphix Session Protocol) certificates from the ... menu.
To use your own certificates, add or modify certificates and CSRs as needed.
When you update the CA certificate, the engine automatically updates HTTPS and DSP certificates that rely on it.
For more information, read Manage certificates.
Storage
Usage-based pricing
If your license uses usage-based billing, use the Delphix usage-based pricing measurement guide to determine TB usage for supported source data.
Engines backed by block devices
The engine automatically discovers block storage devices. For each device, verify Usage Assignment is set to Data if you want to use it for user data.
Assignment options:
-
Enabled: the disk is permanently assigned once saved.
-
Unassigned: disk is held for later use.
Configure at least four disks for user data to improve metadata distribution and overall storage manager efficiency.
Elastic Data Engines (object storage)
Elastic Data Engines require a valid NTP server configuration to ensure reliable communication with object storage.
To configure object-backed engines, select the appropriate object storage provider:
-
Other S3 compatible object storage (use this for on-prem S3-compatible systems)
Outbound connectivity
Web proxy
If your environment uses a web proxy, select Configure web proxy and enter the hostname and credentials.
Enable or disable phone home
Phone home bundles contain engine metadata (no customer data). PII such as Delphix usernames and email addresses is redacted on-engine before upload. Limited environment metadata (IP addresses, database names) may remain for debugging.
Support bundles are deleted automatically within 30 days after upload or 30 days after the related support case is closed, whichever is later.
-
Log in with
sysadmincredentials. -
From the Outbound Connectivity widget, click Modify.
-
Select the Enable phone home service checkbox to enable automatic metadata reporting, or clear it to disable.
-
Click Save.
User-click analytics
User-click analytics collects lightweight, non-PII browser interaction data to help product improvements. No PII (email, IP, usernames) is collected.
SMTP server
-
To enable email alerts and notifications, select Use an SMTP Server and enter the server hostname or IP.
-
Ensure alert emails can reach the configured admin account. For more on alerts, read System faults.
Authentication
Under Authentication, configure LDAP and SAML/SSO. Read Manage users and authentication for more details.
LDAP
-
To avoid configuration issues, consult your LDAP administrator before configuring LDAP authentication for engine users.
-
Enter the LDAP server and choose an authentication type: SIMPLE or DIGEST_MD5.
-
Optional: select Protect LDAP traffic with SSL/TLS and import the LDAP server certificate.
-
Once LDAP is configured, add users and assign LDAP as their authentication method. Read Users and groups for details.
SAML / SSO
To enable SAML-based SSO, configure these properties:
-
Audience Restriction: set this to the Delphix Server ID (the engine’s entity ID). The default format is
https://Delphix Server ID, where the Delphix Server ID is a 36-character hexadecimal string (xxxxxxxx-xxxx-xxxx-xxxxxxxxxxxx).-
If the engine is not yet registered or reachable, you may enter a temporary value (for example
delphix-sp-id) but you must replace it later with the actual Delphix Server ID. For more information, read Get Delphix Server ID and hostname.
-
-
IdP Metadata: paste the XML metadata exported from your identity provider.
Kerberos (optional)
Kerberos enables key-based authentication between hosts when you add new environments to Continuous Data.
-
Realm: the Kerberos authentication domain that authenticates users, hosts, or services.
-
Principal: the unique identity for which Kerberos issues tickets.
-
Keytab: the file that contains principal/encrypted key pairs derived from the Kerberos password.
Registration
Registering the engine allows Delphix Support to identify the engine and diagnose issues.
For more information, read Register your engine.
Online registration (recommended)
If the engine has internet access, provide Delphix Support credentials and auto-register from the Online Registration section.
Manual registration
The engine operates without registration, but supportability is reduced. Register the engine for full support.
If the engine has no internet access:
-
Copy the registration code displayed in the setup.
-
Transfer the code to a machine with internet access (for example, by secure email).
-
On that machine, go to the Delphix Registration Portal and log in with Delphix Support credentials.
-
Paste the registration code and click Register.
Summary and completion
-
On the final Summary page, review every configured section.
-
If everything is correct, click Submit to complete setup.
After Setup
-
The Continuous Data Engine restarts and launches the Delphix Management application in your browser.
-
Log in to the Management application with the initial admin / Delphix credentials and change the password when prompted.