Working with file formats
Import file formats
For all file types other than Mainframe, you can import the file format via the + File Format button, located in the Files tab. This will import the file directly into the Continuous Compliance Engine.
-
From Home, navigate to the Settings page and click into the Data Formats section on the left, then click the Files tab at the top.
-
Click the + File Format button on the top-right, a window with the same name will appear.
-
Select a FormatType and click Next.

-
Import a format by clicking Choose File. You can specify a custom name for the file format instead of it being automatically named after the uploaded file.
-
Browse for the file from which the fields will be imported, then click Next. The contents of the imported file vary for delimited, fixed-width, XML, JSON, and parquet file types.
You must not upload sensitive data when creating a Parquet file format, as the exported file may expose it.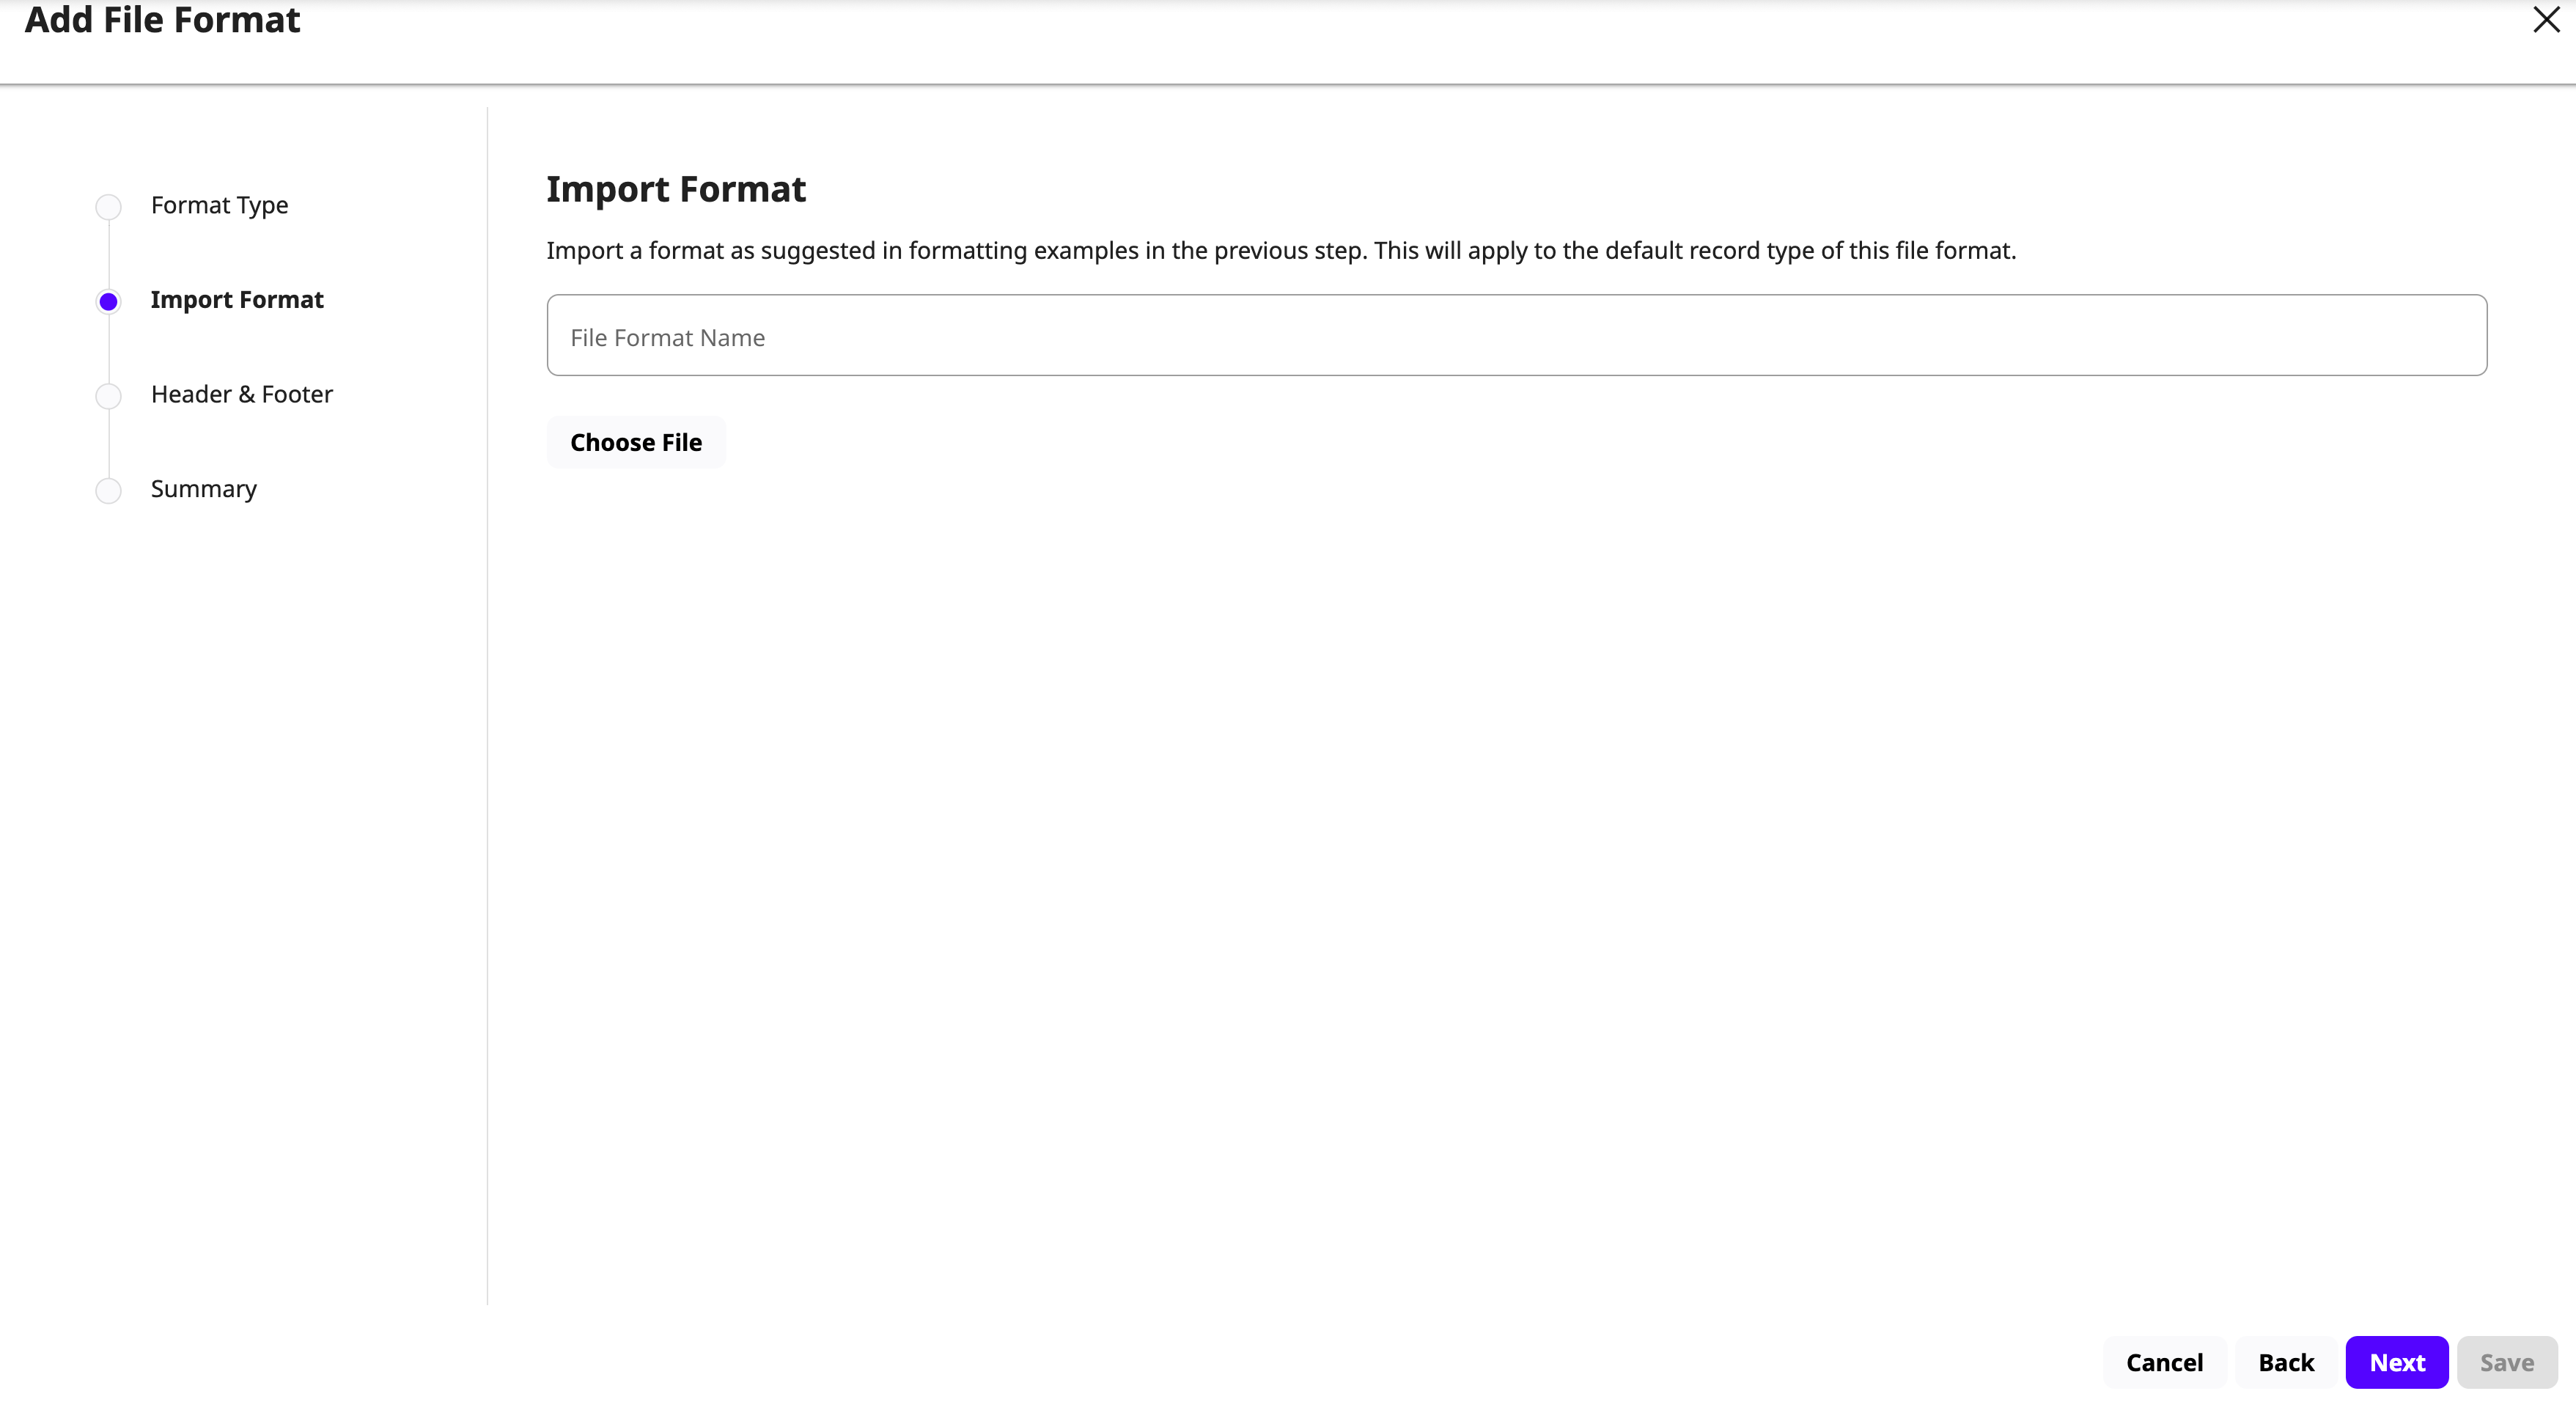
Removing a selected file
If you accidentally selected an incorrect file, simply click the x button to the right of the file name and repeat the selection steps above.
-
Optionally, for only the delimited or fixed-width formats, users will see a step to configure the number of header or footer records for the file. Click Next with or without setting the header or footer, as needed.

-
View the summary on the last step to confirm the changes.
-
Click Save at any point after importing the format.
Import Mainframe formats
For Mainframe data sets, you can import the file format via the + Mainframe Format button, located in the Mainframe tab. This will import the copybook directly into the Continuous Compliance Engine.
-
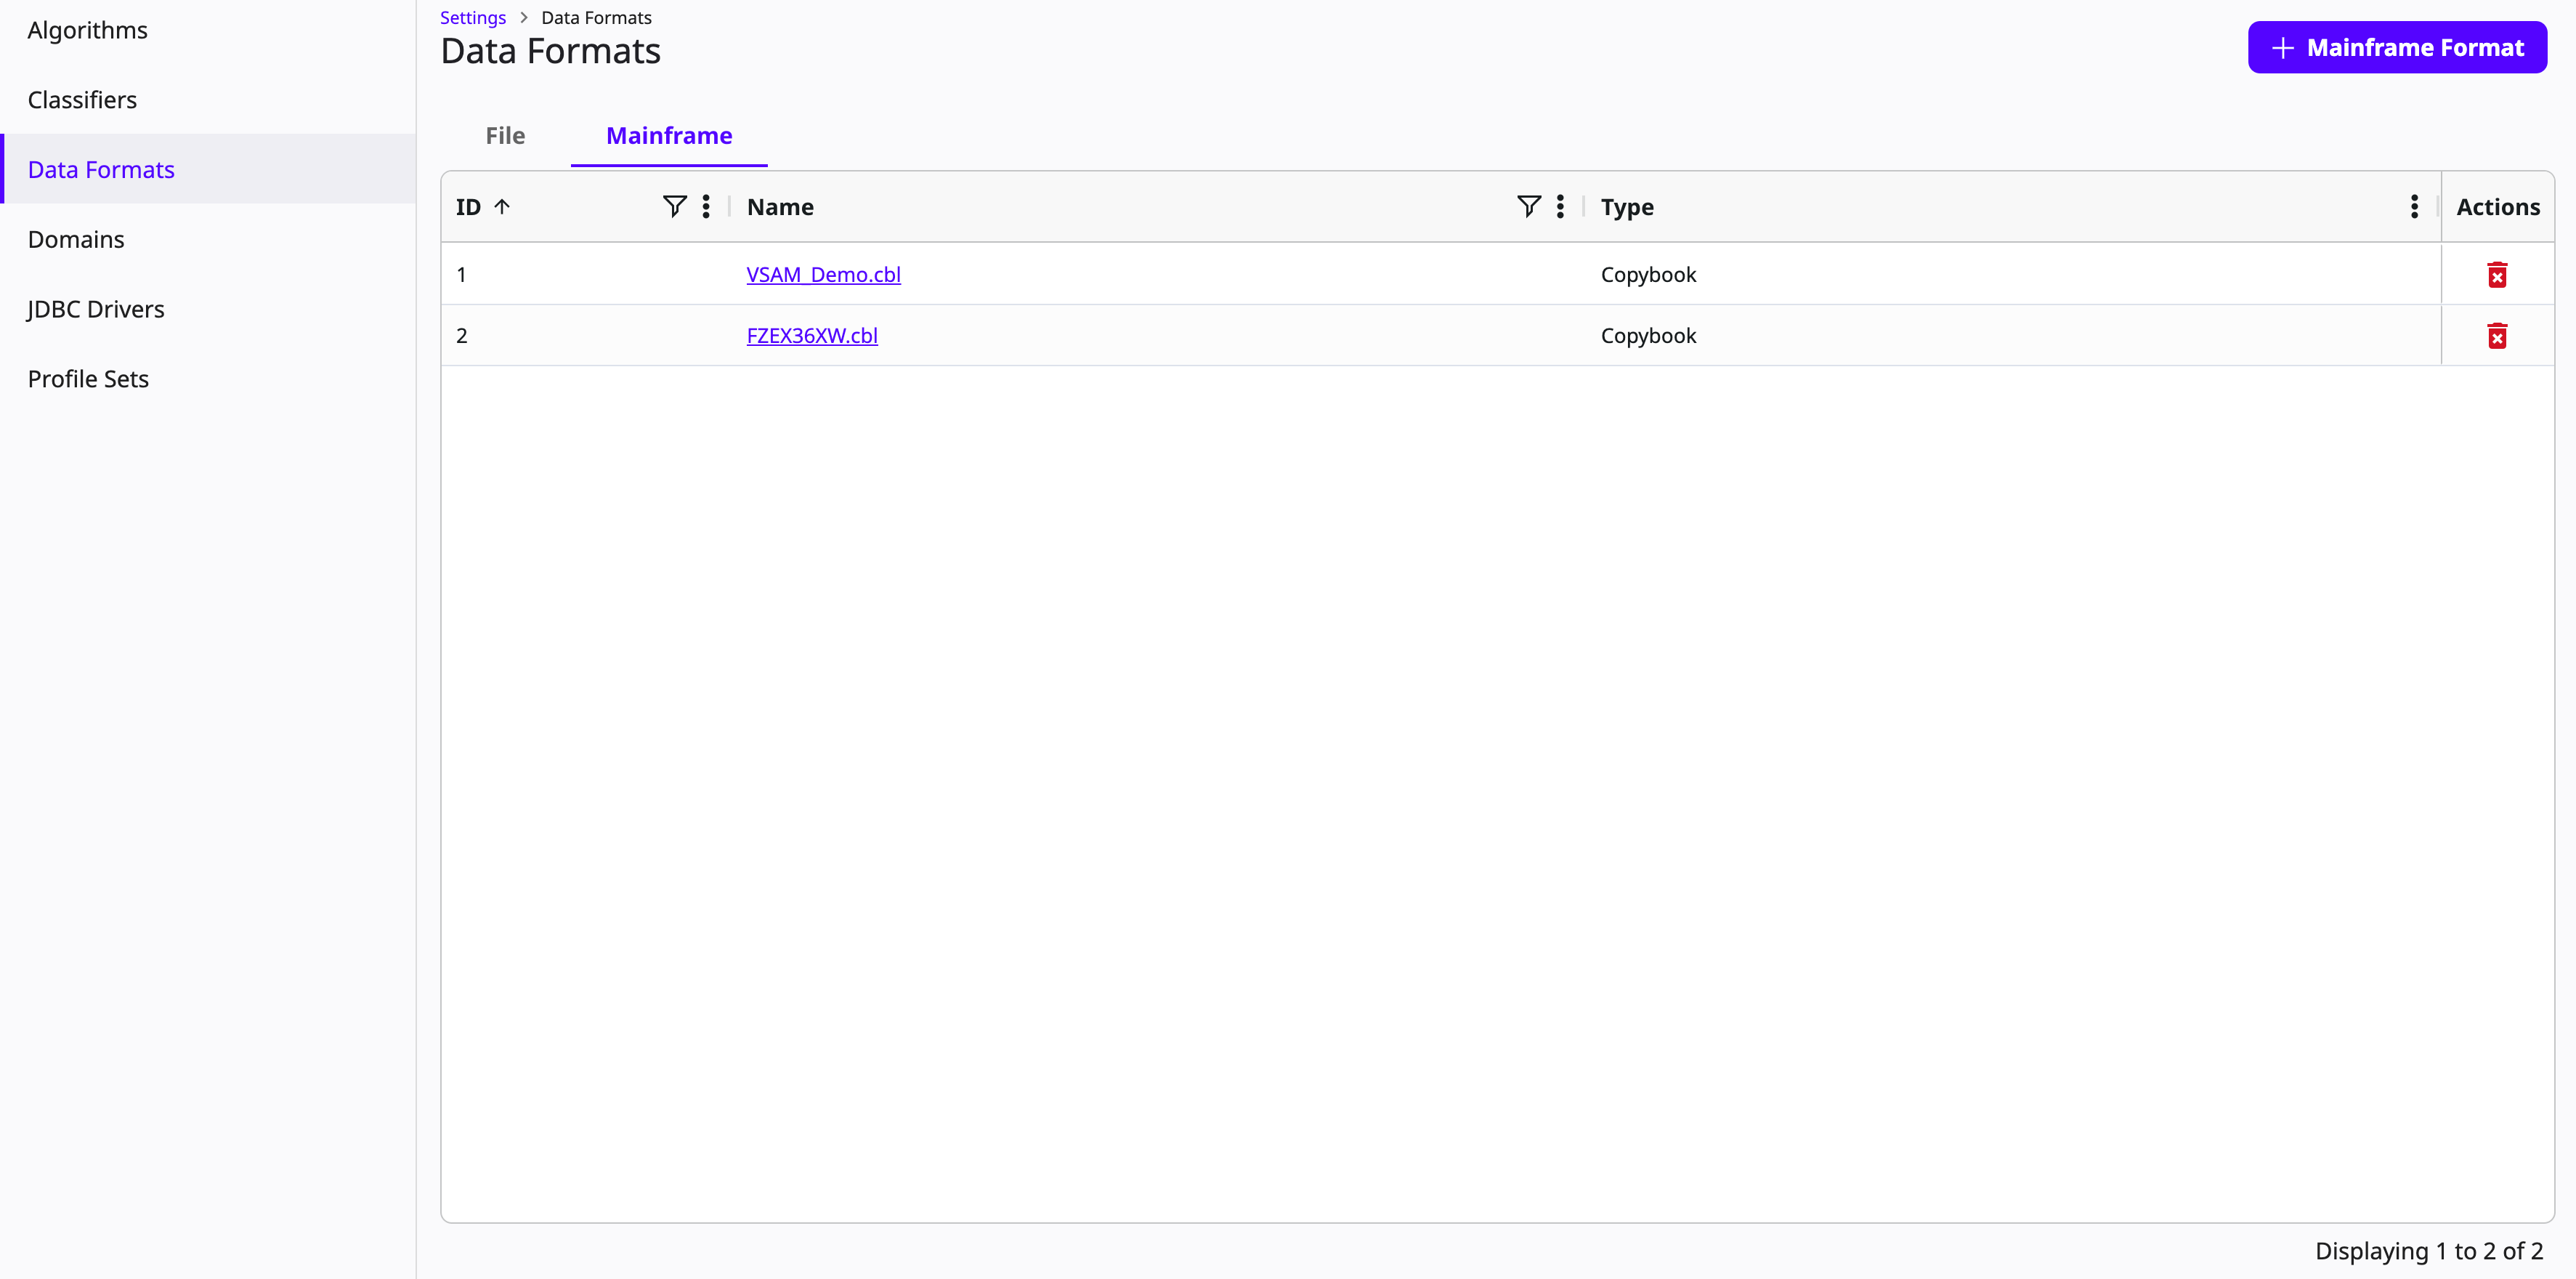
From Home, navigate to the Settings page and click into the Data Formats section on the left, then click the Mainframe tab at the top.
-
Click the + Mainframe Format button on the top-right, a window with the same name will appear.
-
The Format Type will be preselected with Copybook, click Next to continue.

-
Import a format by clicking Choose File.
-
Browse for the format file and click Next
.

Removing a selected file
If you accidentally selected an incorrect file, simply click the ![]() button to the right of the file name and repeat the selection steps above.
button to the right of the file name and repeat the selection steps above.
-
View the summary on the last step to confirm the changes.
-
Click Save at any point after importing the format.
Edit a file format
Selecting the hyperlinked Name of a format in the corresponding column will initiate the file formats edit screen.

Delete a file format
Click the Delete icon  under the Actions columns to the right of the corresponding format name in the list. The user will be prompted for confirmation.
Duplicate file format
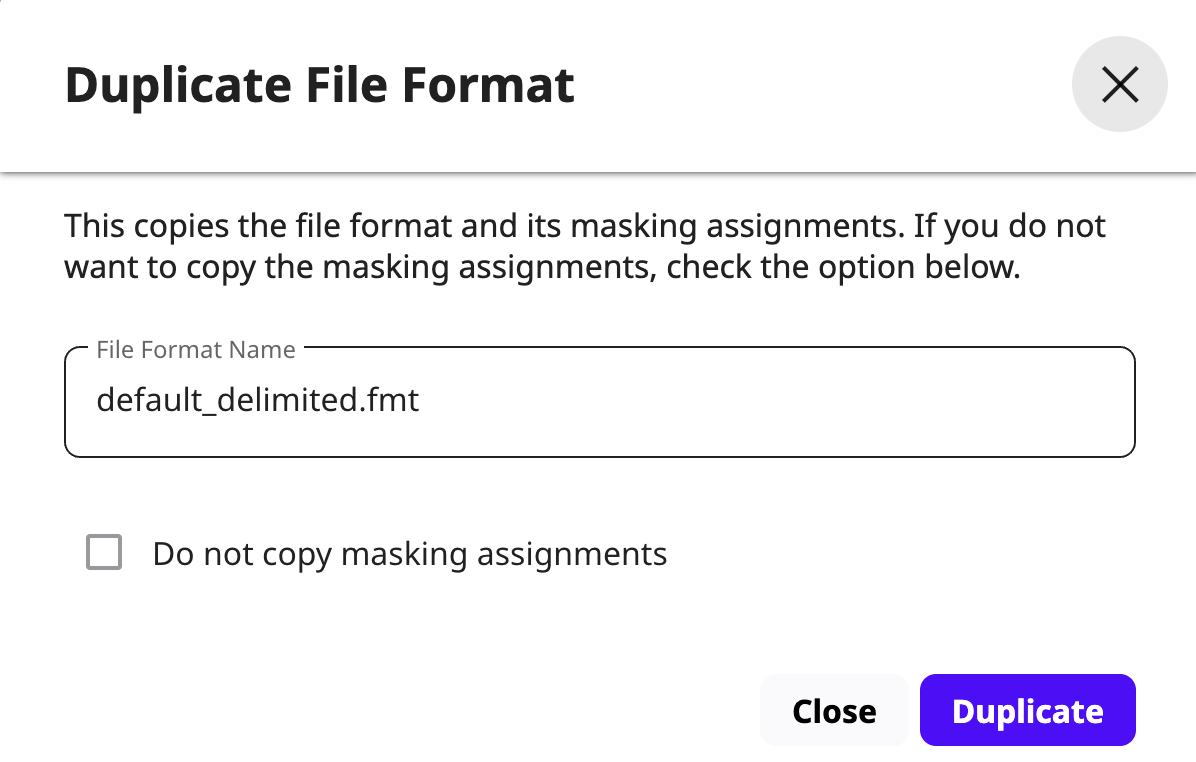
You can duplicate a file format by providing a new file format name. You can also choose whether to copy the masking assignments. By default, the masking assignments are copied. When duplicating a file format, you can exclude masking assignments by selecting the Do not copy masking assignments checkbox in the Duplicate File Format dialog. This option prevents the duplication of file fields algorithm assignments and document store type configurations.
Export file format
You can now export an uploaded file format. For flat file formats such as Fixed-Width and Delimited, select a specific record type to download its format, or leave the selection empty to download the default All Records format. For semi-structured formats XML and JSON, the system generates a file format template with placeholder values based on the extracted path structure.
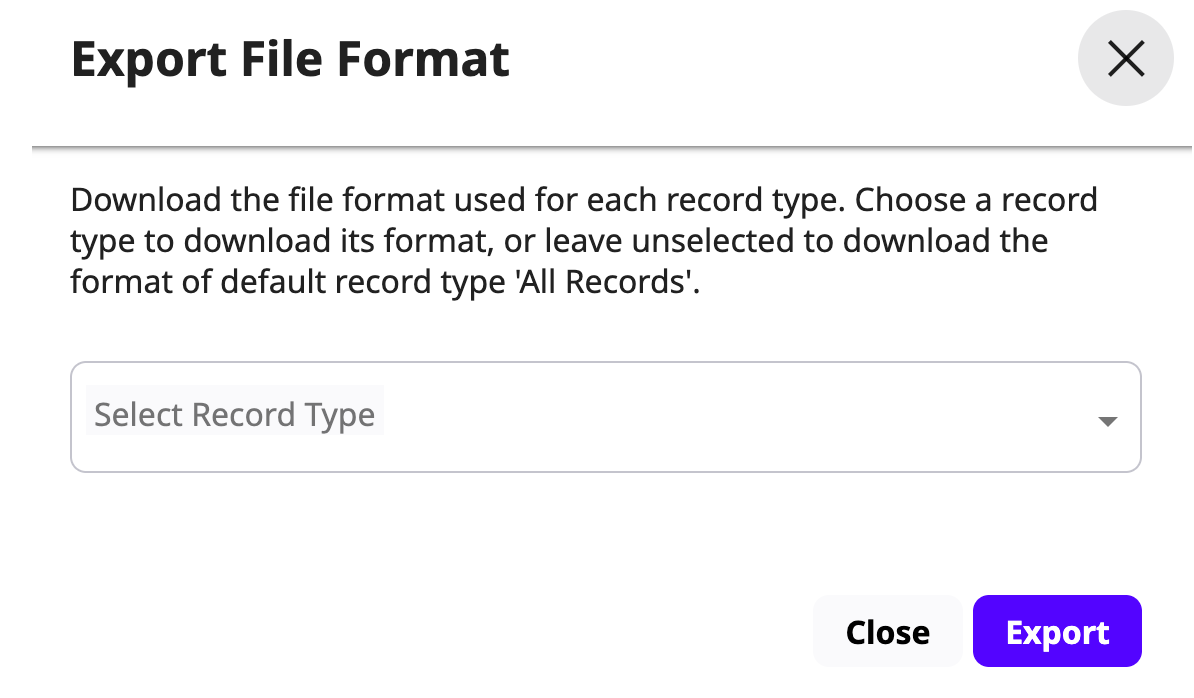
- The Export File Format dialog appears only for Fixed-width and Delimited file formats.
- For exported XML file formats containing namespace fields, the namespace definitions must be manually copied back into the exported file before creating a new file format.